Building your own MCP Server with Node.js
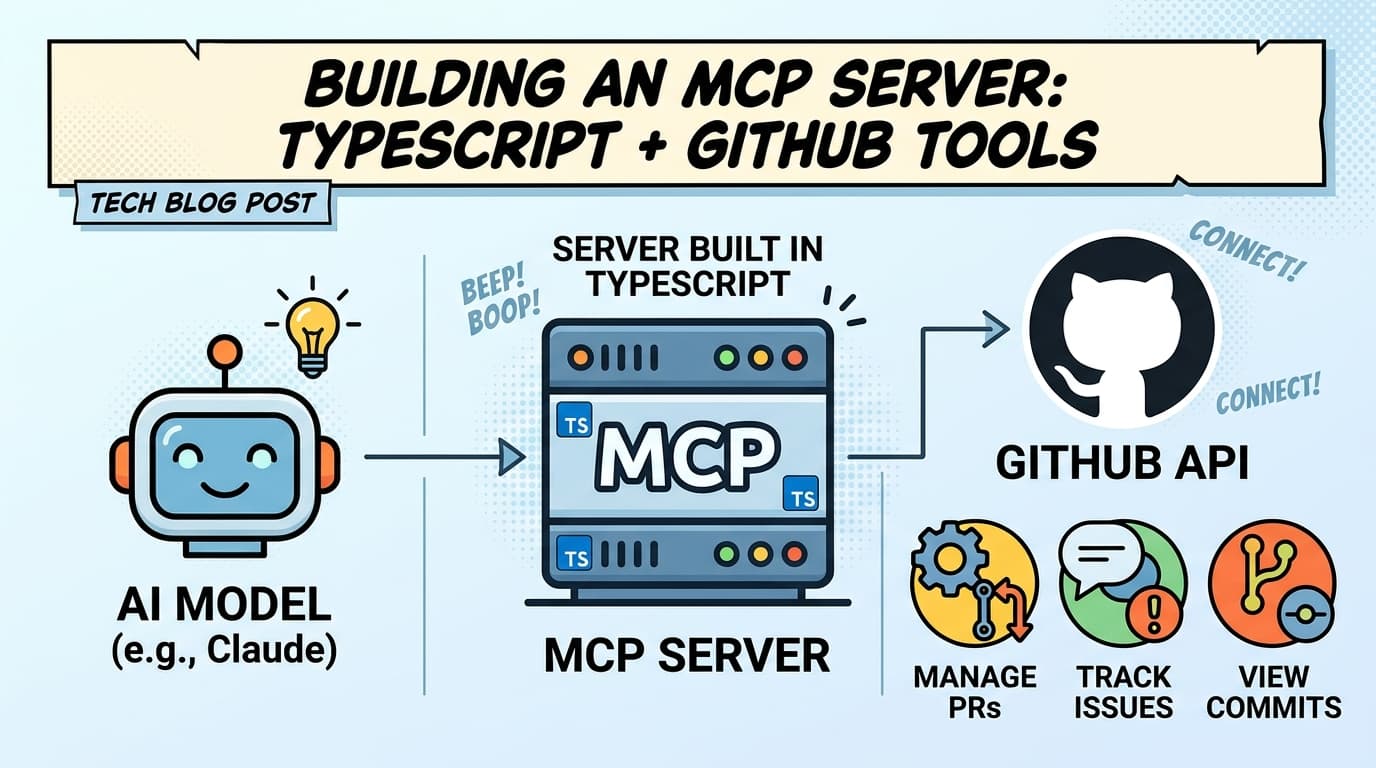
Building a useful AI assistant often starts with a simple problem: the assistant needs access to the systems where your work already lives. GitHub is a good example. An agent that can inspect your profile and browse your repositories can answer questions with current context instead of guessing from a static prompt.
The Model Context Protocol (MCP) gives us a standard way to expose those capabilities. In this guide, we will build a remote MCP server with TypeScript, Express, and the official MCP TypeScript SDK. The server will use Octokit to call the GitHub API and expose two focused tools:
github_get_profile, which reads the authenticated GitHub user's profile.github_list_repos, which lists repositories with visibility and result-limit filters.
The finished server uses MCP's Streamable HTTP transport, protects requests with a bearer token, and can be run locally or with Docker Compose.
Note
This post focuses on the server side of MCP. Your MCP client might be an AI
desktop application, an agent framework, an IDE integration, or your own
application. Once it connects to the /mcp endpoint, it can discover and call
the tools without a custom GitHub integration for each client.
Why MCP
MCP standardizes the boundary between an AI application and the tools or data it can use. Instead of embedding GitHub-specific code in every assistant, we can put that code behind a server and describe its capabilities as MCP tools.
The division of responsibility is straightforward:
- The MCP client decides when a tool should be called.
- The MCP server validates the arguments and performs the operation.
- The GitHub service owns authentication and communication with GitHub.
- The tool result is returned as structured MCP content that the client can show to the model or user.
This separation also makes the server reusable. A chat application and an IDE can connect to the same GitHub MCP server, while the GitHub token remains on the server instead of being shipped to the client.
1. Scaffold the TypeScript Server
Create a project and install the runtime dependencies:
mkdir gooseworks-mcp
cd gooseworks-mcp
pnpm init
pnpm add @modelcontextprotocol/sdk @octokit/rest dotenv express zod
pnpm add -D @types/express @types/node tsx typescript
Add a typecheck and a start script to package.json:
{
  "type": "commonjs",
  "scripts": {
    "start": "tsx src/index.ts",
    "dev": "tsx watch src/index.ts",
    "typecheck": "tsc --noEmit"
  }
}
The repository uses a small, feature-oriented structure:
src/
	index.ts                 # Express app and MCP transport
	server.ts                # MCP server construction
	config/env.ts            # Environment variables
	middleware/auth.ts       # Bearer-token authentication
	services/github.ts       # Shared Octokit client
	tools/github/            # GitHub tool registrations
Keeping the HTTP transport, service clients, and tool definitions separate is useful as the server grows. A tool should describe an agent capability, while the service layer should hide provider-specific API details.
2. Configure GitHub and Server Secrets
Create a .env file locally. The GitHub token is used only by Octokit, and MCP_AUTH_TOKEN is the token that an MCP client must send when connecting to this server.
PORT=4000
GITHUB_TOKEN=github_pat_replace_me
MCP_AUTH_TOKEN=replace_with_a_long_random_value
Load those values once from the environment and fail early when a required secret is missing:
import dotenv from "dotenv";

dotenv.config();

export const config = {
  port: process.env.PORT || 4000,
  githubToken: process.env.GITHUB_TOKEN || "",
  mcpAuthToken: process.env.MCP_AUTH_TOKEN || "",
};

if (!config.githubToken || !config.mcpAuthToken) {
  throw new Error("GITHUB_TOKEN and MCP_AUTH_TOKEN are required.");
}
The real repository reports a specific error for each missing variable before exiting. That is friendlier during deployment because a missing GitHub token and a missing transport token are easy to distinguish in the logs.
Create the GitHub client in one place so every tool shares the same authenticated Octokit instance:
import { Octokit } from "@octokit/rest";
import { config } from "../config/env.js";

export const octokit = new Octokit({ auth: config.githubToken });
Use a fine-grained GitHub personal access token with only the permissions required by the tools you enable. Do not commit .env, put tokens in tool arguments, or log authenticated request headers.
3. Add a Profile Tool
An MCP tool has a name, metadata, an optional input schema, and a handler. The profile tool needs no arguments, so its schema can be omitted. The handler calls GitHub and returns JSON as MCP text content:
src/tools/github/getProfile.ts
import { McpServer } from "@modelcontextprotocol/sdk/server/mcp.js";
import { octokit } from "../../services/github";

export function registerGetProfileTool(server: McpServer): void {
  server.registerTool(
    "github_get_profile",
    { description: "Gets the authenticated user's profile details." },
    async () => {
      const { data } = await octokit.rest.users.getAuthenticated();

      return {
        content: [{ type: "text", text: JSON.stringify(data, null, 2) }],
      };
    },
  );
}
The tool name is part of the public contract. Choose names that are stable, descriptive, and easy for a model to distinguish from related operations. Returning a deliberately shaped object is also a good option when the upstream response contains fields that the model does not need.
4. Add a Validated Repository Tool
Tools that accept input should validate it at the protocol boundary. Zod gives the MCP SDK a schema it can use both to validate calls and to describe the tool to clients.
src/tools/github/listRepos.ts
import { McpServer } from "@modelcontextprotocol/sdk/server/mcp.js";
import { z } from "zod";
import { octokit } from "../../services/github";

export function registerListReposTool(server: McpServer): void {
  server.registerTool(
    "github_list_repos",
    {
      description: "Lists repositories for the personal account.",
      inputSchema: {
        type: z.enum(["all", "owner", "public", "private"]).optional(),
        limit: z.number().optional(),
      },
    },
    async ({ type = "owner", limit = 10 }) => {
      const { data } = await octokit.rest.repos.listForAuthenticatedUser({
        type,
        per_page: limit,
        sort: "updated",
      });

      const repos = data.map((repo) => ({
        name: repo.name,
        full_name: repo.full_name,
        private: repo.private,
        html_url: repo.html_url,
        description: repo.description,
      }));

      return {
        content: [{ type: "text", text: JSON.stringify(repos, null, 2) }],
      };
    },
  );
}
The complete repository adds descriptions to both schema fields, which helps an MCP client present better tool metadata to a model. In a production server, it is also worth constraining limit to a sensible range, for example with a Zod refinement, so a caller cannot accidentally request an unnecessarily large page.
Notice that the handler returns a small projection of each repository instead of forwarding every field from GitHub. This reduces context sent to the model and makes the result easier to scan while preserving the information most users need.
5. Compose and Register the Server
Create the McpServer once per MCP connection and register the capabilities it should expose:
src/tools/index.ts
import { McpServer } from "@modelcontextprotocol/sdk/server/mcp.js";
import { registerListReposTool } from "./github/listRepos";
import { registerGetProfileTool } from "./github/getProfile";

export function registerAllTools(server: McpServer): void {
  // GitHub tools here
  registerGetProfileTool(server);
  registerListReposTool(server);
  // some other provider tools here
}
src/server.ts
import { McpServer } from "@modelcontextprotocol/sdk/server/mcp.js";
import { registerAllTools } from "./tools";

export function createMcpServer(): McpServer {
  const server = new McpServer({
    name: "gooseworks-mcp",
    version: "1.0.0",
  });

  registerAllTools(server);

  return server;
}
The project uses a small registerAllTools function instead of putting every tool in server.ts. That pattern keeps the root server composition readable and makes it easy to add another provider later.
6. Expose MCP Over Streamable HTTP
MCP clients need an HTTP endpoint that understands the protocol handshake, session identifiers, and JSON-RPC messages. The SDK's StreamableHTTPServerTransport handles that protocol work. Express is responsible for routing, authentication, and parsing JSON requests.
The important request flow is:
- An authenticated client sends an
initializerequest toPOST /mcp. - The server creates a transport and connects a new
McpServerto it. - The transport assigns a session ID and the server stores the transport.
- Later requests reuse the transport selected by the
Mcp-Session-Idheader. GET /mcphandles server-sent notifications, andDELETE /mcpcloses a session.
Here is the central Express setup:
src/index.ts
import express, { Request, Response } from "express";
import { randomUUID } from "node:crypto";
import { StreamableHTTPServerTransport } from "@modelcontextprotocol/sdk/server/streamableHttp.js";
import { isInitializeRequest } from "@modelcontextprotocol/sdk/types.js";
import { config } from "./config/env.js";
import { authenticate } from "./middleware/auth.js";
import { createMcpServer } from "./server.js";

const app = express();
app.use(express.json());

// Session registry for active HTTP transports
const transports: Record<string, StreamableHTTPServerTransport> = {};

app.post("/mcp", authenticate, async (req: Request, res: Response) => {
  const sessionId = req.headers["mcp-session-id"] as string | undefined;
  let transport: StreamableHTTPServerTransport;

  if (sessionId && transports[sessionId]) {
    // 1. Reuse existing session transport
    transport = transports[sessionId];
  } else if (!sessionId && isInitializeRequest(req.body)) {
    // 2. Initialize a new session transport when handshake starts
    transport = new StreamableHTTPServerTransport({
      sessionIdGenerator: () => randomUUID(),
      onsessioninitialized: (id) => {
        transports[id] = transport;
      },
      onsessionclosed: () => {
        if (transport.sessionId) {
          delete transports[transport.sessionId];
        }
      },
    });

    const server = createMcpServer();
    await server.connect(transport);
  } else {
    res.status(400).json({
      jsonrpc: "2.0",
      error: {
        code: -32000,
        message: "Invalid session ID or initialize request",
      },
      id: null,
    });
    return;
  }

  await transport.handleRequest(req, res, req.body);
});

// GET /mcp for SSE notifications & DELETE /mcp for session teardown
const handleSessionRequest = async (req: Request, res: Response) => {
  const sessionId = req.headers["mcp-session-id"] as string | undefined;
  if (!sessionId || !transports[sessionId]) {
    res.status(400).send("Invalid or missing session ID");
    return;
  }
  await transports[sessionId].handleRequest(req, res);
};

app.get("/mcp", authenticate, handleSessionRequest);
app.delete("/mcp", authenticate, handleSessionRequest);

app.listen(config.port, () => {
  console.log(
    `GitHub MCP Server active on http://localhost:${config.port}/mcp`,
  );
});
As you can see we also map authenticated GET and DELETE requests to the active session transport which returns JSON-RPC-shaped errors for invalid initialization requests. Those details matter because a streamable HTTP client can make more than one request during a session.
Protect every MCP method, not only POST. The authentication middleware in this project accepts the exact HTTP header below:
Authorization: Bearer <MCP_AUTH_TOKEN>
7. Run and Connect the Server
Install dependencies, create .env, and start the development server:
pnpm install
pnpm dev
The default endpoint is:
http://localhost:4000/mcp
Before connecting an AI client, run the compiler check:
pnpm typecheck
Configure your MCP client with the endpoint and bearer token. The exact configuration format depends on the client, but the values are always the same:
{
  "url": "http://localhost:4000/mcp",
  "headers": {
    "Authorization": "Bearer replace_with_a_long_random_value"
  }
}
Once connected, the client can discover the two tools and decide when to use them. For example, a request such as “How many private repositories do I have?” can lead to a call to github_list_repos with type: "private", followed by a natural-language response based on the live GitHub result.
The MCP handshake is normally managed by the client. If you are debugging a custom client, inspect the response headers for the assigned Mcp-Session-Id and send it on subsequent requests.
8. Containerize the Service
The repository includes a small Node-based image and a Compose service. After creating .env, build and start it with:
docker compose up --build -d
docker compose logs -f gooseworks-mcp
Compose passes PORT, GITHUB_TOKEN, and MCP_AUTH_TOKEN into the container. For a public deployment, terminate TLS at a reverse proxy and expose the proxy's HTTPS /mcp URL to clients. Keep the GitHub token and MCP bearer token in the deployment secret store rather than baking them into the image.
Design Notes for Production
The basic server is intentionally small, but a few practices make it easier to operate safely:
- Use least-privilege GitHub permissions. Read-only tools should not receive write scopes.
- Bound and normalize inputs. Limit pagination values and validate repository names or owners before making upstream calls.
- Return useful errors. Convert expected GitHub failures into concise tool errors while keeping stack traces in server logs only.
- Avoid leaking secrets. Never include access tokens in tool results, exception messages, or request logs.
- Consider rate limits. GitHub API responses include rate-limit information; production tools can surface a helpful retry message when the limit is near exhaustion.
- Plan for sessions. The in-memory registry is process-local, so multi-instance deployments require an explicit session strategy.
- Add observability. Record request duration, tool name, and outcome, but redact prompts, credentials, and private repository content.
MCP does not remove the need for normal API security. It gives the agent a well-defined tool boundary, and that boundary is where authentication, validation, authorization, and careful result shaping belong.
9. Test the MCP Server with VS Code Copilot
To verify that the server works in a real development workflow, you can connect it to an MCP-enabled client such as VS Code Copilot. Because our server uses Streamable HTTP transport and bearer token authentication, we configure VS Code to pass the required Authorization header during the session handshake.
Configure VS Code
Add your remote server details to your VS Code MCP settings file (typically .vscode/mcp.json in your workspace, or your global user configuration):
{
  "servers": {
    "gooseworks-github": {
      "url": "http://localhost:4000/mcp",
      "type": "http",
      "headers": {
        "Authorization": "Bearer replace_with_a_long_random_value"
      }
    }
  },
  "inputs": []
}
Run a Test Query
Once configured, GitHub Copilot Chat automatically performs the initialize request against POST /mcp, retrieves the session ID, and discovers github_get_profile and github_list_repos.
-
Open Copilot Chat in VS Code and switch to Agent Mode.
-
Type a natural language query that requires access to your GitHub account:
"What is my current GitHub profile username, and how many private repositories do I have?"
-
Copilot detects that it lacks static knowledge of your GitHub account, identifies the relevant MCP tools, and requests permission to call
github_get_profileandgithub_list_repos. -
Approve the tool execution.
Copilot sends the JSON-RPC request to your Express server, Octokit fetches the live data from GitHub, and the server returns the structured response. Copilot then parses the tool output and answers your prompt with live context.
What We Built
We now have a TypeScript MCP server that:
- exposes GitHub capabilities through standard MCP tools;
- validates tool inputs with Zod;
- uses Octokit for authenticated GitHub API requests;
- serves the MCP protocol over Streamable HTTP;
- keeps sessions alive with
Mcp-Session-Id; - protects
POST,GET, andDELETEMCP requests with bearer authentication; and - runs locally with
pnpmor as a Docker Compose service.
The same structure works beyond GitHub. Replace the Octokit service with a database client, ticketing API, filesystem adapter, or internal service, then register narrowly scoped tools that give an AI client useful access without exposing the entire underlying system.
Tip
The full repository for this blog post can be found here.
Sources
Protocols and SDKs
- Model Context Protocol: The open protocol specification and concepts for tools, resources, prompts, and transports (modelcontextprotocol.io).
- MCP TypeScript SDK: Server APIs, transports, and TypeScript examples (github.com/modelcontextprotocol/typescript-sdk).
- Streamable HTTP transport: MCP transport guidance for HTTP clients and servers (modelcontextprotocol.io/specification/2025-06-18/basic/transports).
Application Libraries
- TypeScript: The language and compiler used for the server (typescriptlang.org).
- Node.js: The JavaScript runtime used to run the service (nodejs.org).
- Express: HTTP routing and middleware for the server (expressjs.com).
- Octokit REST: The GitHub REST API client used by the tools (github.com/octokit/rest.js).
- Zod: Runtime schema validation for tool arguments (zod.dev).
- dotenv: Local environment configuration (github.com/motdotla/dotenv).
GitHub API
- Authenticated user endpoint: GitHub API documentation for reading the current user's profile (docs.github.com/rest/users/users#get-the-authenticated-user).
- List repositories for the authenticated user: GitHub API documentation for repository visibility filters and pagination (docs.github.com/rest/repos/repos#list-repositories-for-the-authenticated-user).
- Fine-grained personal access tokens: GitHub guidance for limiting token permissions (docs.github.com/authentication/keeping-your-account-and-data-secure/managing-your-personal-access-tokens).